Everyone loves to receive a card in snail mail, or as a gift wit a birthday gift ...or even when someone is sad. A card says to others that you are thinking of them. And you cared enough to send a home created gift.
This card in particular has style!!
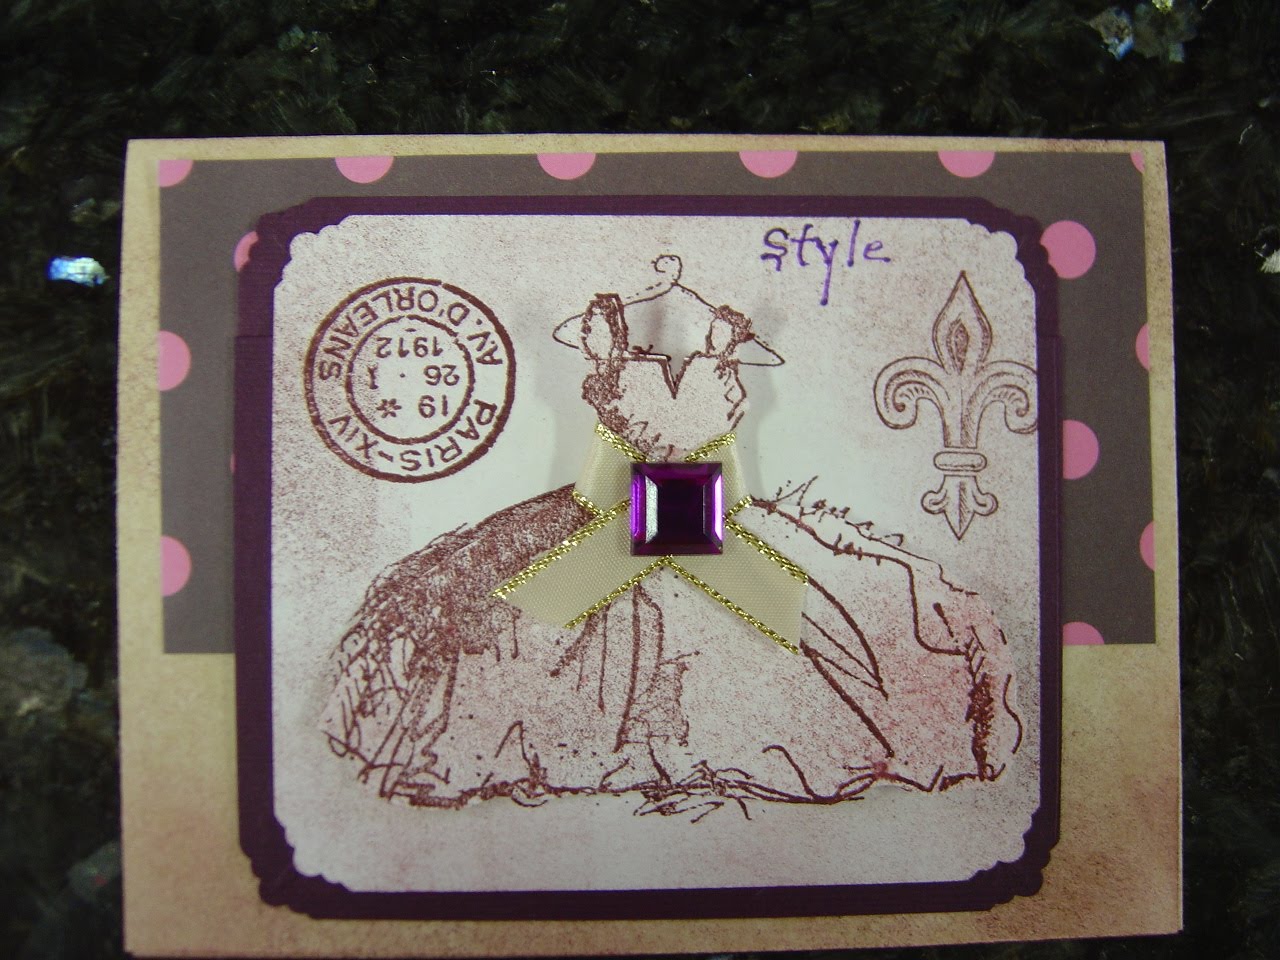
This card is great for girl friends birthdays. The front says "STYLE" so on the inside of the card you can write...
you may be another year older but you still got STYLE!
So let's get started. First get out all your products, choose the main color you want the overall card to be . Here I used purple for the ink and embellishments and used a beige card. I like to use a heavy weight cardstock, preferably 85lb or heavier.
Now you begin with cutting your 8 1/2 X 11 1/2 sized cardstock in half width wise and then fold.
After you folded the card you will stamp the dress image onto a white card stock scrap and ink with a sponge the edges of the dress, then cut it out .You can also add the ribbon around the waist, tape into place and add embellishment. I used a dark purple diamond shaped jewel. Set aside.
Now you can take another piece of white card stock and stamp the dress image again. this time add two additional stamps for interest. I used the Paris stamp and the Fleur De Le on the corners, above the dress and handwrote STYLE in brown or purple. Then take that sponge and ink with purple(light) and apply to edges of card and overlap onto dress.
Do not cut this one out, you can add a corner punch design if you like and then matt with a dark purple mat or a lighter coordinating color.
Next take your blank card and start to layer. Attach the designer pattern piece,which is slightly smaller than the card itself and only half the size, then softly sponge the edges with the purple ink.
Add the white cardstock with the dress inage to the middle of the card, and softly sponge the whole card again, to unify colors. Attatch the cut-out dress image directly onto the stamped dress with demensional sticker sponges.
When card is finished, add your greeting inside the card. You can either write it out with colored pen or print message on computer using special fonts and print and cut out and apply inside. also don't forget to sign the back of your card or add a label.
Hope you will have fun with this project. People just love home created cards. People tell me that they are so happy to know that I was thinking of them Who needs to hear from you today? Send them a greeting that only you can create.
Stay tuned for my next project...a little Pin
cushion bird that is adorable. You could make them for Christmas gifts for the people who sew in your family. They are also decorative, even if you don't sew. If you have ant old wooden thread spools keep them for this project or..but them at garage sales. I love to buy Grandma's old sewing kits or tins. They usually have lots of good things like old buttons, tools, spools, yarn and more. Talk later kathy


No comments:
Post a Comment